The arrival of the output transformers today gave me the impetus to finalize a few things in the 6AS7 SET design. So now I have a complete schematic with all the important information noted on it.
Here is the schematic for a single channel of the amplifier and the whole power supply.
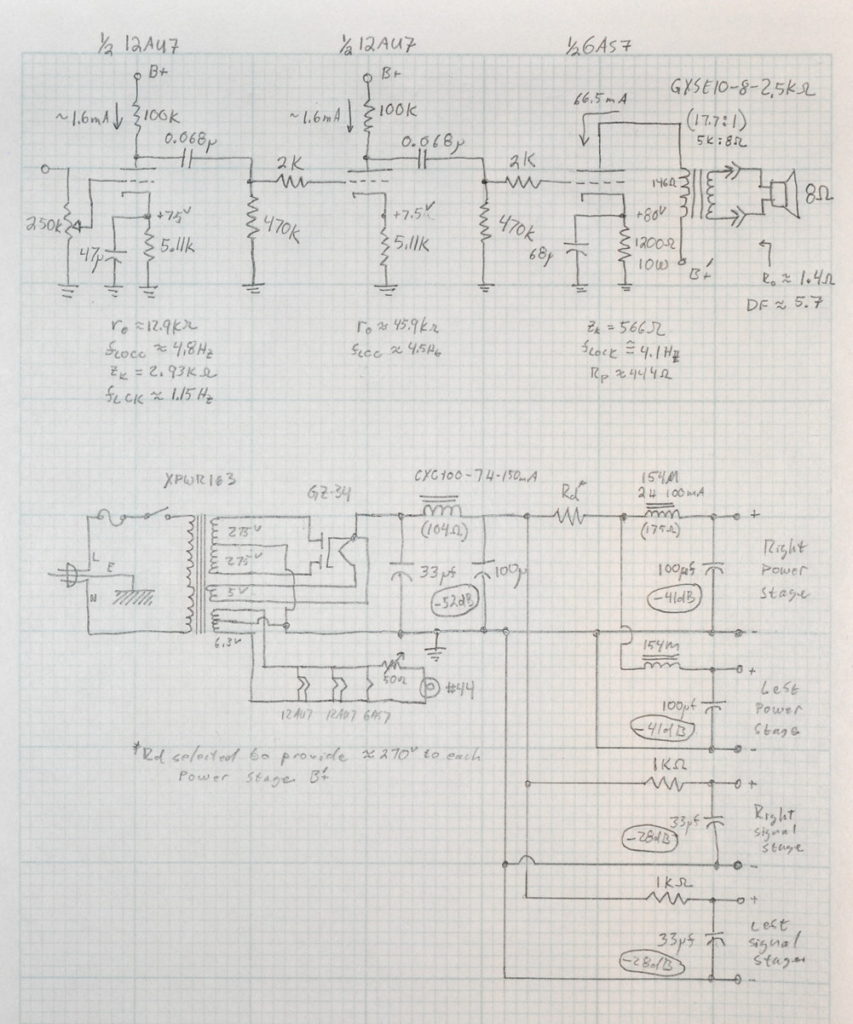
A few things of note. First is the fact that only the first stage of the driver is cathode bypassed; and its bypass capacitor is rather large. I have done this to keep the low end response as full as possible. This is ok because power stage will overload long before this stage ever comes close. In fact, even in major overdrive situations, it is unlikely that the first stage of the driver will ever be overdriven.
Second, the damping factor of this amp is in the neighborhood of 4.2 meaning that it should handle some of the larger, high efficiency speakers rather well. Better than the zero-feedback UL amps and much better than any pentode amplifier without major feedback. (I know it says 5.7 on the schematic but I forgot to include the output transformer primary resistance when I wrote that. With that extra 146Ω the output referenced output resistance is closer to 1.9Ω instead of 1.4Ω)
Third, the B+ supply to the signal stage filters is BEFORE the dropping resistor in the power supply. This is because the power stage need to run off of ≈270v but the driver B+ to be as close to 300v as possible to get the full driver swing at relatively low distortion. This also means that this is not one of those amps where you can adjust the B+ by choosing a different rectifier tube with a different drop. This design is purpose built for the GZ-34/5AR4 octal rectifier.
Lastly, I’ve been told that the way I draw the power supply with negative reference terminals for each voltage confuses some people. This lines are for reference only and don’t correspond to actual wires in the design. I may change the way I draw supplies with each voltage referenced instead to the signal ground to avoid confusion. I’ll think about that when I post the final project page.
The next step is final hardwood selection for the chassis and some time in the shop to get it put together. More to come.